Blog Archives
Developing a pool game in Alice 2.2
Introduction
In this article I will describe the development of a pool game in Alice. Because the game is quite complicated I will describe the development in a number of stages.
Upon starting the development I decided to simplify things a bit. In particular I decided to work with only two balls – the cue ball and the one ball. This is always a good policy when developing code – start simple then build up. If I can develop code that works for two balls, then I can investigate whether it generalised to deal with many balls.
Stage 1: Ball Collision
The plan for the first stage of development was to implement collision detection between two balls. To do this I needed some way of moving the cue ball. Therefore the requirements for the first stage of development became:
- The user shall be able to aim and move the cue ball
- The program shall detect collision between the cue ball and the one ball and react in a suitable manner.
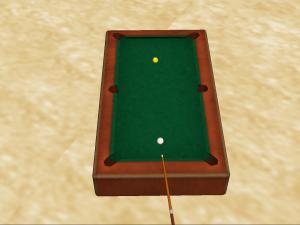
To represent the aiming of the cue ball I added a cue. The user is able to rotate the cue using while key is pressed events. In addition I added support for varying the power of the shot. Pressing the down arrow pulled the cue backwards and hence increased the power of the shot. Pressing the up arrow decreased the power of the shot.
Detecting collision between the cue ball and the one ball is fairly straightforward. To do this we use the cueball within threshold of function to check whether the cueball and one ball are touching. This check is done within a when condition becomes true event, so that collision is continuously being monitored. For this stage I went with a simple reaction to collision – the cue ball moves backwards and the one ball moves forwards.
The code for the first stage is available for download at http://www.alice.org/community/showthread.php?p=44054#post44054
Stage 2: Bouncing off cushions
In this stage I planned to add boundary detection for the cushions of the pool table. Furthermore I wanted to make the reaction of colliding balls more realistic, i.e. make them move at a realistic angle.
In order to implement boundary detection I need a way of defining the cushions of the pool table. As it happens the pool table is defined as a single object, so the cushions are not defined. In order to define the boundaries of the cushions I placed four dummy objects along the cushions. This is similar to the idea presented in the video below, however in this case I chose not to shrink the dummy objects.
The dummy objects on the side cushions were position such that the right hand direction markers were facing directly out from the side of the table. Similarly the dummy objects on the end cushions were position so that the forward direction markers were facing out from the table. This is illustrated in the following picture.
These dummy objects can then be used to detect collision with the cushions. For the side cushions a collision occurs when the ball is not to the left of the dummy object. For the end cushions, we test whether the ball is not behind the dummy object. These checks were placed in a function, which is then called within a method, reboundOffCushion, which implements rebounding of balls off of the cushions. This method is called within a while world is running event, which continually checks for collisions. In this version of the code a ball that collides with a cushion is turned at an angle of 90 degrees.
Improved ball collision
The other main enhancement during this stage of development was to improve the collision between balls. In the first version the one ball travelled directly forwards, while the cue ball travelled backwards regardless of what angle the balls collided. To improve ball collision we turn each ball so that it is pointing towards the centre of the other ball. We then rotate each ball 180 degrees. Probably not perfect physics, but it does provide a reasonable effect, allowing the player to play straight shots as well as cut shots.
The code for this second stage is available for download at http://www.alice.org/community/showthread.php?p=44057#post44057


